Blog

Crochet Snake Plant

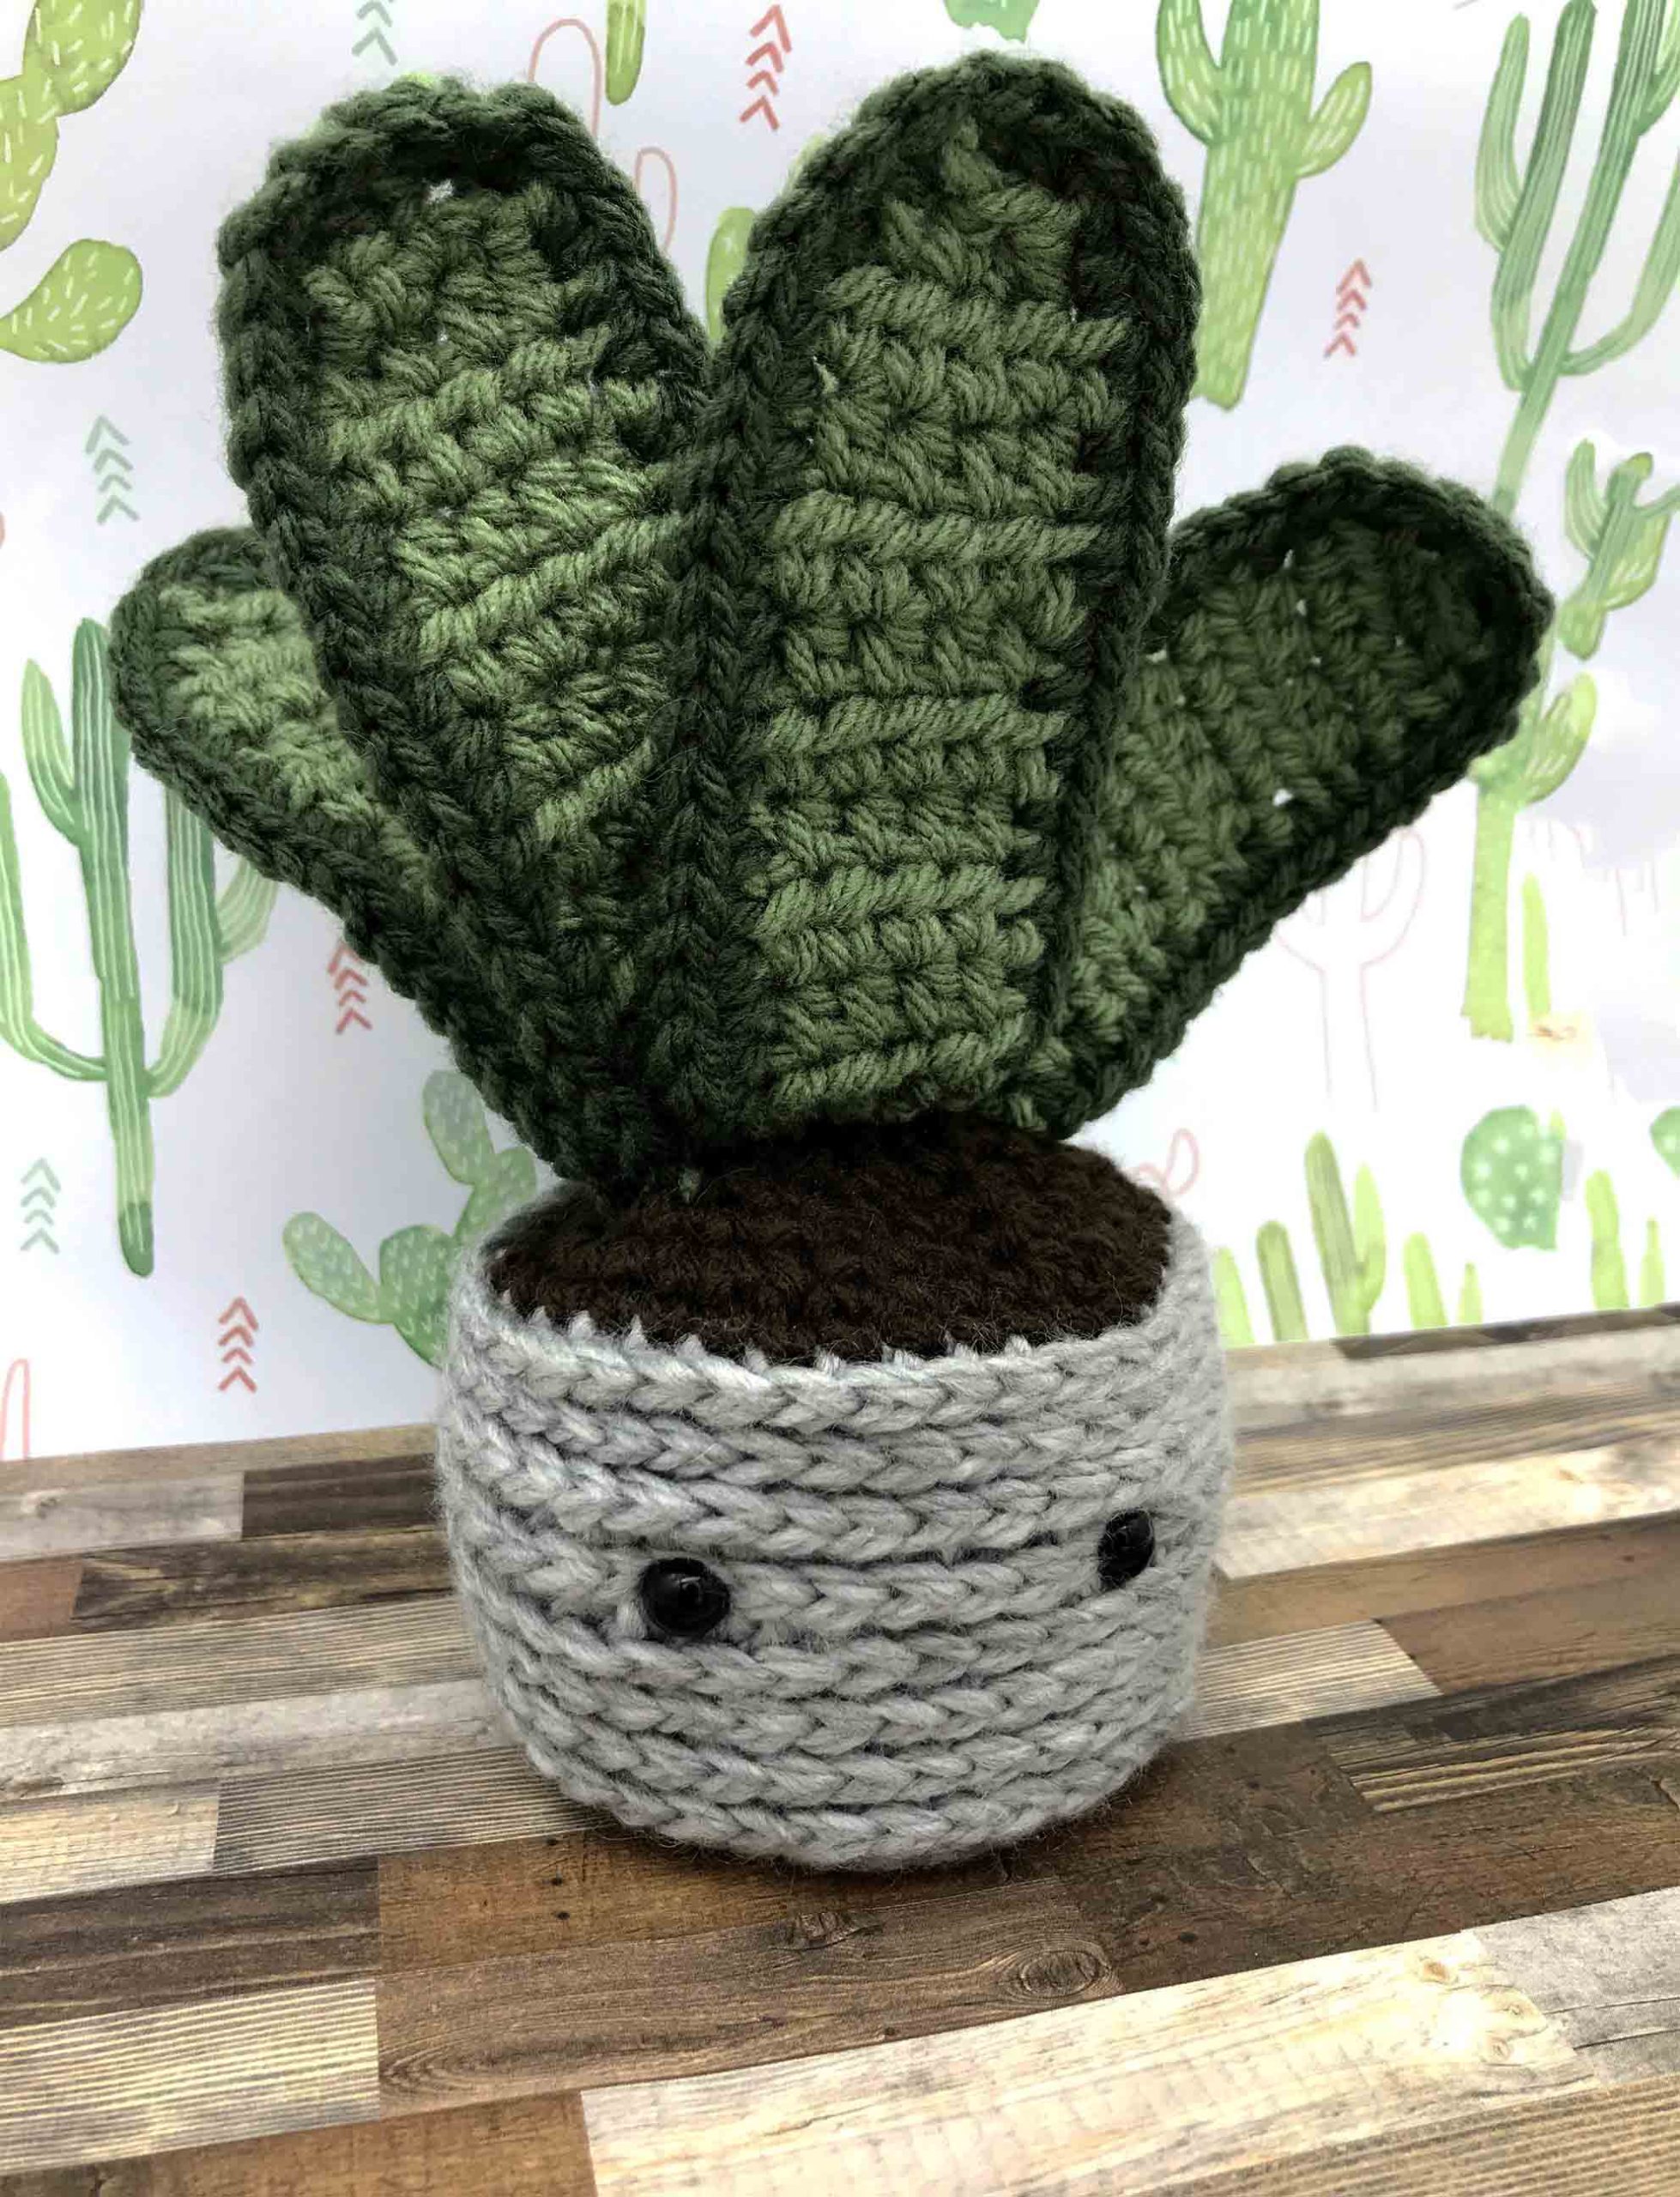
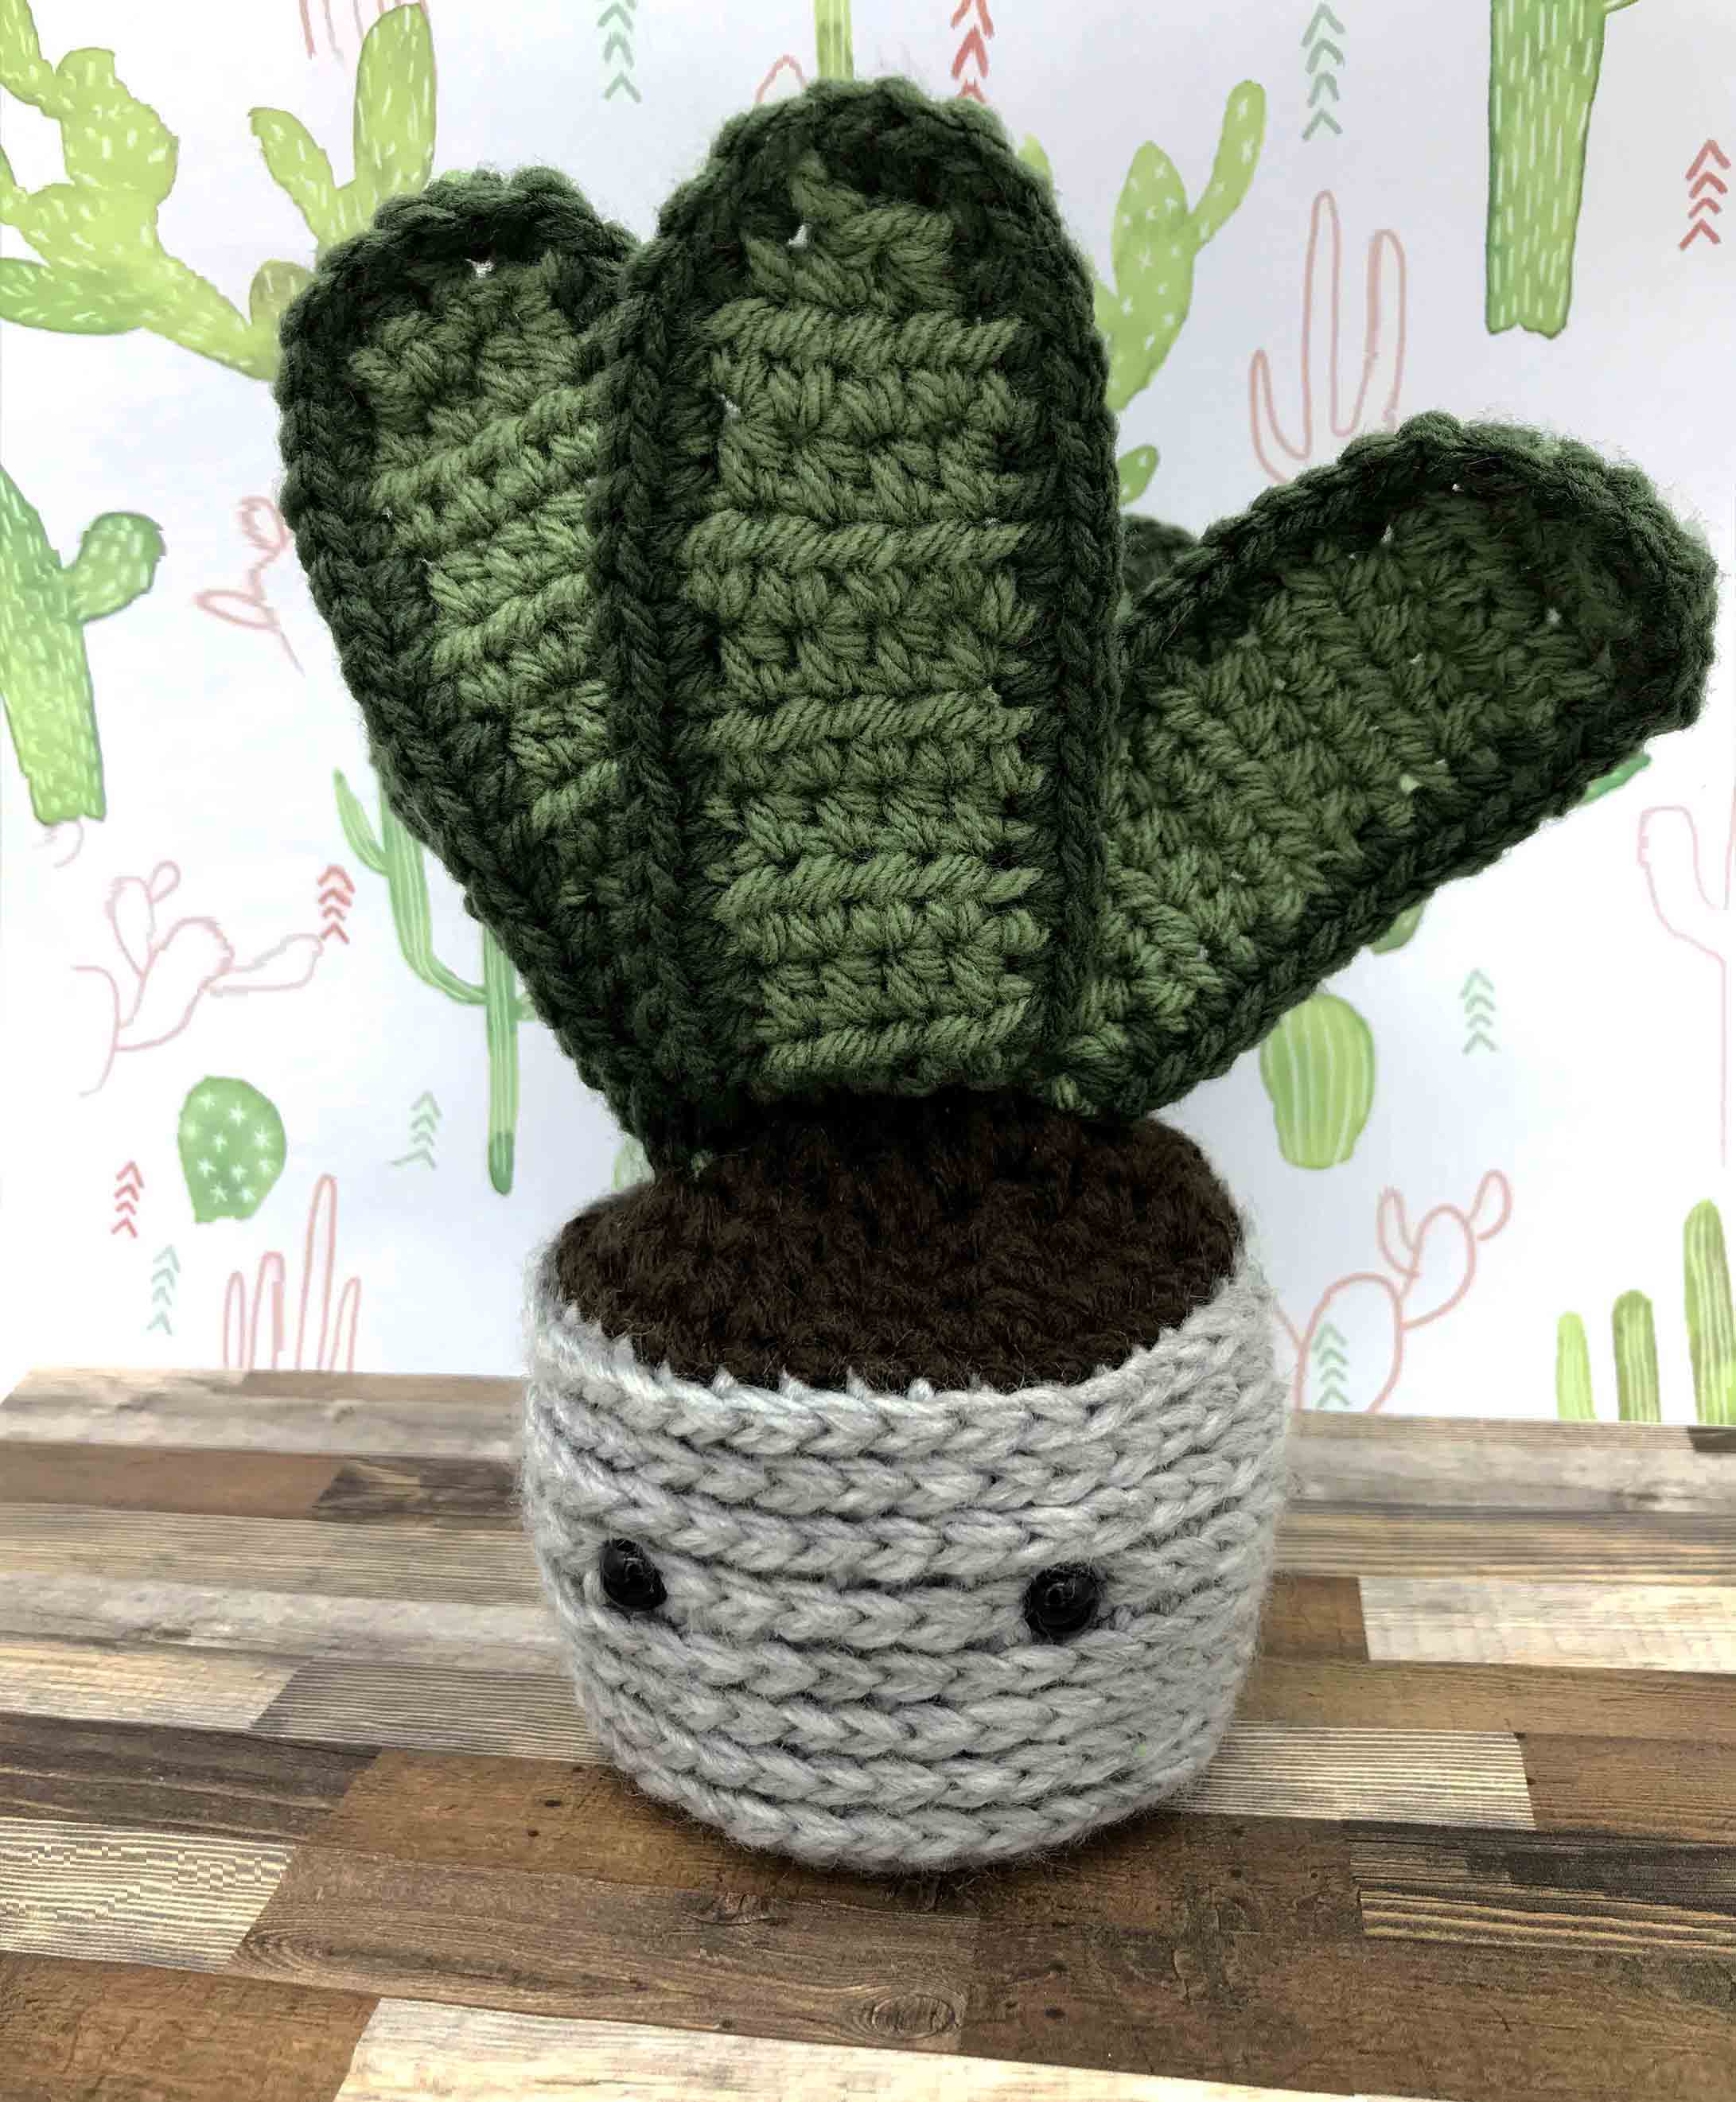
Crochet Snake Plant Amigurumi

cactus-amigurumi-square

A free, crochet snake plant pattern that requires no maintenance! If you’re like me, you were not born with a green thumb. I’ve managed to keep a single aloe plant alive for the last year and I’m amazed at myself… but I know it probably won’t last. This is why I wrote this pattern! For all of us who lack gardening skills, I present to you all, the plant that will live forever. Enjoy!

Materials used:

-4 mm crochet hook

-Worsted Weight Scrap yarn- I used gray for the pot, dark brown for the dirt, and both light and green yarn for the leaves.

-Tapestry needle

-Stitch marker

-Scissors

*This pattern is crocheted in spirals except for the leaves which are worked flat.

Make the Pot:

1. sc 6 in magic ring (6)

2. *inc * repeat around (12)

3. *sc, inc* repeat (18)

4. *sc 2, inc* repeat (24)

5. *sc 3, inc* repeat (30)

6. *sc 4, inc* repeat (36)

7. hdc around through back loop only (36)

8-15 hdc around through the THIRD loop. If you are new to this concept, please see the video below:

16. Switch to dark brown (dirt colour) and then *sc 4, dec* repeat around (30)

17. *sc 3, dec* repeat around (24)

18. *sc 2, dec* repeat around (18)

Insert safety eyes between rows 12 and 13 and begin to fill with polyfill or plastic pellets. I used pellets.

19. *sc 1, dec* repeat around (12)

20. dec around (6), finish off and sew hole closed.

Make the Leaves- make 6 or desired number of leaves:

1. With light green colour, chain 6, leaving a long tail to sew the leaf onto the pot.

2-10. hdc across starting in the second chain from hook, ch1, turn. (5)

11. dc, sc, dc, ch1, turn (3)

12. dec 3 together and finish off. (1)

Switch to dark green colour and sc evenly around 3 sides of the leaf.

Weave in ends of all leaves, except for the long tail you left at the beginning.

In order to help the leaves stand up a bit, hold 3 together like a fan with the centre leaf in front of the other 2 and sew them together with a few stitches where they meet. I sewed them together about three-quarters of the way up.

Pin the leaves to the pot and sew them all on using the long tail from the beginning. Do the same with the second row of leaves.

Enjoy your immortal plant!

If you liked this pattern, please tag your finished object @_woolstreet on Instagram!

Please visit my other patterns as well!

Easy Crochet Circle Purse

Easy Crochet Circle Purse

Ready to take that first step into making some accessories? This easy crochet circle purse is quick and simple and will sure get some requests from your friends to make them one too.

It’s great for those busy summer days and wedding celebrations.

The finished size is 10 inches in diameter.

What You’ll Need:

- 10mm crochet hook

- Hooked Zpaggetti (super bulky yarn) 60 meters/ 66 yards

- Tapestry Needle

The Pattern

Let’s go!

*Please note, all increases will be done with dc stitch when you’re making the 2 purse halves and in hdc when joining the halves*

First half of the purse:

  1. Make a magic loop, ch3, dc 12 in magic loop, sl st to first dc made (12 dc)
  2. ch3, 2dc in each st around, sl st to first dc made (24 dc)
  3. ch3, *dc, inc* repeat to end, sl st to first dc made (36 dc)
  4. ch3, *dc 2, inc* repeat to end, sl st to first dc made (48 dc)
  5. STRAPS: ch 70 st (or more if you would like longer straps, test as you go along), skip 10 st, sl st into next st and fasten off

Second half of the purse:

  1. Follow the same instructions for the first half of the purse but DO NOT FASTEN OFF

*Here you are going to stop what you’re doing and weave in the ends of the purse halves. It will be difficult to do later when the purse is put together.*

Joining the 2 halves:

Hold halves together with right sides facing out, line up the straps so they are aligned.

Insert your hook into the next stitch and also through the stitch on the back half.

Make a slip stitch.

You will work the remaining stitches through both halves of the purse:

*3 hdc, inc* repeat 8 times.

3 hdc, sl st (in the same stitch as the beginning of the strap) and fasten off.

Weave in remaining ends.

You can line your purse with fabric if you wish.

Enjoy!


-Megan Lee

Crochet Cat Bed Pattern

Crochet Cat Bed Pattern

cat in a crochet cat bed

The perfect crochet cat bed pattern that you can pump out in a weekend! Start on Friday and have your kitty snuggling up in their new bed by Sunday evening.

The finished size is 16 inches in diameter with 14 inches of lounging space for your fuzzy buddy. The sides are a comforting 5 inches tall. For size idea, my cat is 13 pounds and fits perfectly inside.

** I made this with a contrasting color for the bottom, if you want to do this as well, change colors on the SIDES portion of the pattern on row 3.

What You’ll Need

  • 600 grams of Super Bulky Yarn (approximately 950 yards). I used Bernat Softee Chunky Tweeds yarn
  • 10 mm crochet hook
  • Tapestry needle

Pattern:

**You will hold the yarn double throughout the construction of the bed.

First we will make the bottom of the bed, then the sides and then the inside of the bed where your cat will sleep.

The bottom:

  1. Holding yarn double, sc 6 in magic ring (6)
  2. *inc * repeat around (12)
  3. *sc, inc* repeat (18)
  4. *sc 2, inc* repeat (24)
  5. *sc 3, inc* repeat (30)
  6. *sc 4, inc* repeat (36)
  7. *sc 5, inc * repeat (42)
  8. *sc 6, inc * repeat (48)
  9. *sc 7, inc * repeat (54)
  10. *sc 8, inc * repeat (60)
  11. *sc 9, inc * repeat (66)
  12. *sc 10, inc * repeat (72)
  13. *sc 11, inc * repeat (78)

Sides:

1-15 sc all around

** If you want to have a contrasting color for the bottom, switch colors on row 3 of this portion and continue with the new color until the end.

Inside:

  1. *sc 11, dec* repeat (72)
  2. *sc 10, dec* repeat (66)
  3. *sc 9, dec* repeat (60)
  4. *sc 8, dec* repeat (54)
  5. *sc 7, dec* repeat (48)
  6. *sc 6, dec* repeat (42)
  7. *sc 5, dec* repeat (36)
  8. *sc 4, dec* repeat (30)
  9. *sc 3, dec* repeat (24)
  10. *sc 2, dec* repeat (18)
  11. *sc 1, dec* repeat (12)
  12. dec 6

Finish off and sew the hole closed and voila!

Push the inside of the bed down into the middle and shape the sides.

Your bed is ready for you cat to sleep in for the 23 hours a day that she sleeps.

Enjoy!

- Megan Lee

~~~

See my Crochet Cat Basket Pattern to make storage for cat toys.

Madeleine Coomey Yarn Bowl

Madeleine Coomey Yarn Bowl

I want to share my latest addition to my collection of yarn bowls. It’s just too pretty to keep to myself.

Madeleine Coomey made this bowl and is a Canadian potter based out of Vancouver, British Columbia. Along with yarn bowls, she makes gorgeous mugs, plates and some funky dishes.

Funky Dish

The yarn bowls feature cute cut out hearts which are a staple in her bowl designs. The yarn bowl is sturdy and has a bit of a curved lip to keep the yarn from bouncing out if you pull too hard. The cut out section where the string goes is the perfect size as well, it can accommodate sock weight yarn to chunky no problem!

The one I chose has a blue flowery motif adhered to it which reminds me of ancient Chinese pottery. I love how are timeless they are. The neutral colour of the bowl is nice and will look great wherever you choose to use it.

view of cut out hearts on yarn bowl
close up of flowers on yarn bowl

If flowers aren’t for you, Madeleine has some solid colour patterns to choose from as well!

Her materials of choice are ceramic and granite. If you ask me the granite bowls are stunning and boast the same heart motif as the ceramic bowls. Madeleine is a true artiste at work.

Check out her bowls here!

Happy knitting and crocheting!


-Megan Lee

Peaks and Valleys Cowl

The Peaks and Valleys Cowl Knitting Pattern


I have always been a fan of simple, classic knits and so I was inspired to create this cowl using only knit and purl stitches, and what emerged was the simple knit Peaks and Valleys Cowl.

What You’ll Need

  • 300 yards of bulky weight (5) yarn
  • 6mm 18 inch circular needle- US Size 10
  • Stitch Marker
  • Row Counter

The yarn I used was a 2 ply hand-spun, delicious, merino yarn from Gateway Fibreworks in Muskoka, Ontario. I love to support local where I can and this yarn was perfect for this project.

Now let’s get to the good stuff.. the pattern:

The Peaks and Valleys Cowl Knitting Pattern

Cast-on 100 stitches using the longtail cast-on method and join in the round, placing your stitch marker and being careful not to twist your stitches. You can watch this video if you are new to the longtail cast-on.

Be sure to slip your marker at the beginning of each new round.

Round 1: Knit

Round 2: Purl

Round 3-5: Knit

Repeat rows 2-5 until the cowl measures about 12 inches or until the desired length.

Purl one more round and then knit one more round.

Cast-off loosely using your normal knit cast-off.

That’s it! You’re done! You can block your cowl if you wish or wear it right away. Enjoy!

-Megan Lee

View of the peaks and valleys cowl from the front

-Megan Lee

Eco Farm and Hand Puppets

This past week I’ve been busy whipping up a special order for an Eco conscious company in Ontario!

I was asked to make a few farm themed hand puppets and a couple of other eco themed items. I quickly jumped at the opportunity and started looking for patterns.

We landed on a farmer girl hand puppet, a rooster and raven puppet as well as a globe and a head of lettuce.

Handmade knit and crochet puppets and imgurimi
Farm gang

Having never made hand puppets before, this was really fun for me.

I could see myself making more of these in the future if the opportunity comes up again.

My favorite piece to make was the globe (however UN-geographically correct it may be!) and I learned a new technique of color work. It was also really fun seeing how cute the world is with a smile 🙂

I took a few creative liberties with the original patters, which worked out great in the end. The braids and a hat were added to the farmer girl and I created the red pieces for the rooster drawing from my inventory of crochet stitches that I know.

The lettuce turned out to be life sized which I thought was hilarious. I can picture the kids throwing this around like a football.

Overall this was a great commission project and I hope to have more like this in the future.

See you next time, thanks for reading.

-Megan Lee

Wool Street and LivSimple Farms

LivSimple Farms logo

This Christmas craft show season, LivSimple Farms will be hosting my hats, baskets and bags all the way out in Enterprise, Ontario, near Kingston.

Liv specializes in handmade goat milk products including soaps, shampoos, conditioners and lotions. I've personally used the soaps and face mask so I can say they're pretty great products!

Goat's milk is amazing for your skin - it contains a lot of vitamin A which helps to repair your skin, the lactic acid helps to remove dead skin cells AND to top it all off, it's super moisturizing.

Check out her website so see all the things she makes.

I've been busily working on getting some inventory made up this summer in preparation for the craft show. There will be mom and baby matching hats, cat baskets, market bags and more.

Red and White Beach Bag
set of 7 reusable cotton pads
crochet fingerless gloves

Owl Book Cover Pattern

Owl Book Cover

RELEASE PARTY!

Knitted book cover with owls


Please join me in the celebration of the 3 year anniversary of my first pattern release 🙂 The Owl Book Cover Pattern!


I started designing the Owl Book Cover Pattern when I saw that my books were getting frayed and bent by stuffing them into my purse everyday. The book cover protects the pages and makes it easier to store in my bag. It can of course be used for anything you want – makeup bag, i-pad cover or tablets etc.

Final size of storage area (excluding flap) is 8 x 6 inches FLAT – will stretch to accommodate larger objects.


This is knit flat and then sewn together using mattress stitch.

Materials:


-Size US 8 / 5.00mm needle
-Worsted weight yarn- gauge 4 st/ inch in stockinette stitch
-2 buttons approximately 1-1.25 inches in diameter for fastening
-4 small buttons for eyes
-Tapestry and sewing needles
-Cable Needle


Abbreviations:
CO- Cast on
K- knit
P-purl
St- stitch
St st- stockinette stitch
sl- slip
psso- pass the slipped stitch over
pw- purlwise
RS - right side WS - wrong side


Cable Instructions:
C4B- slip 2 stitches pw onto cable needle, hold needle in back, knit 2 stitches from left needle, then knit stitches from cable needle
C4F- slip 2 stitches pw onto cable needle, hold needle in front, knit 2 stitches from left needle, then knit stitches from cable needle
C2B- slip 1 stitch pw onto cable needle, hold needle in back, knit 1 stitch from left needle, then knit stitch from cable needle
C2F- slip 1 stitch pw onto cable needle, hold needle in front, knit 1 stitch from left needle, then knit stitch from cable needle

Begin:


Cast on 38 stitches
Knit 9 rows in garter stitch, slipping the first stitch pw starting on row 2.
Row 10 (Button hole row): K8– make 1 button hole (see below. We are making a 4 stitch button hole) – once that is completed, knit until there are 12 stitches remaining – make second button hole- knit to the end of the row.


Making the button holes:
1 Bring yarn to front of work, slip 1 stitch pw.
2 Bring yarn to back of work again
3 sl 1, psso, sl 1, psso, sl 1, psso, sl 1, psso
4 Slip the last stitch back to left needle
5 Turn work
6 Bring yarn to back of work
7 CO 5 stitches using cable cast on method
8 Turn work and bring yarn to back again
9 Sl 1 stitch pw and pass last CO st over


Continue:
Knit 9 rows in garter stitch, slipping the first stitch pw
Change to stockinette st until piece measures 9.5 inches then make the owls.


Make the Owls:
Row 1-RS- K4, P5, C4B, C4F, P4, C4B, C4F, P5, K4
Rows 2-6- Work stitches as established (knit the knits, purl the purls)
Row 7-RS – Repeat row 1 Row
Row 8-10 – Work stitches as established (knit the knits, purl the purls)
Row 11- RS- Repeat row 1
Row 12- Work stitches as established (knit the knits, purl the purls)
Row 13- K4, P5, C2B, K4, C2F, P4, C2B, K4, C2F, P5, K4
Row 14- Purl all stitches


Continue in st st for 1.5 inches, ending in a WS row.
Knit 7 rows slipping first st pw.
Bind off – the right side should be facing you during bind off.

Finishing:

-Sew on buttons for the owls’ eyes.
-Sew the sides together using mattress stitch starting at the bottoms.

Fold piece so the wrong sides are touching – the right side is facing you. Make sure to leave flap loose- the garter stitch area with the button holes should not be sewn. Align large buttons on garter stitch area on the front side of the tote with button holes on the flap and sew to front of piece.

Weave in any loose ends.

Done! Enjoy your Owl Book Cover!

knitted beige book cover with owls

Summer Stitchin’

Summer is a time for sipping drinks, sitting by the lake and soaking up the sun. I try to do this as often as I can because I know it’s not going to last forever. Soon the winter will be upon us and I’ll be back to curling up under blankets and knitting sweaters.. but enough about the cold.

I’ve been keeping my hands busy this summer making purses and beach bags. My latest adventure has been making market bags. We all know how important taking care of the planet is and with one simple change we can make all the difference. I chose super soft cotton yarn to make these, it’s so soft and dreamy.

Taking just one of these bags to the grocery store or farmer’s market can save up to 30 plastic bags a year. So you can imagine how many you save if you use 2 or even 3!

I made 3 crochet style bags and 2 knitted ones to far. Head over to the shop to see my knit bags- you will have to visit ReStyle in Brampton to see the crochet ones 🙂

3 Crochet market bags pictured with 3 different coloured bottoms. Aqua, turquoise and purple.

Woolstreet and ReStyle Beauty Boutique

ReStyle Beauty Boutique with Woolstreet Crochet Purses

A quick update to announce that I’ve teamed up with ReStyle Boutique in Brampton- they’ll be carrying my purses and bags ! Hooray! This is super exciting to say the least and I’ve got a bunch of new ideas coming your way. Stay tuned!!

ReStyle Beauty Boutique with Woolstreet Crochet Purses

ReStyle is a local consignment and beauty shop. They take gently used name brand items for reselling. They sell new items as well from pillows to handmade kimonos which are quite stunning. Also on their list of offers are group calligraphy nights, yoga, and beauty services and treatments like EyEnvy and Makeup Forever.

Head to downtown Brampton to check em out!

Scroll to top